False Lashes for Your Eye Shape: Style, Fit and Placement
The right lash works with the eye shape, lid, makeup technique and intended effect. Use this artist’s guide to choose, fit and refine lashes for individual eyes.

By Raphael Oliver
· 10-minute read
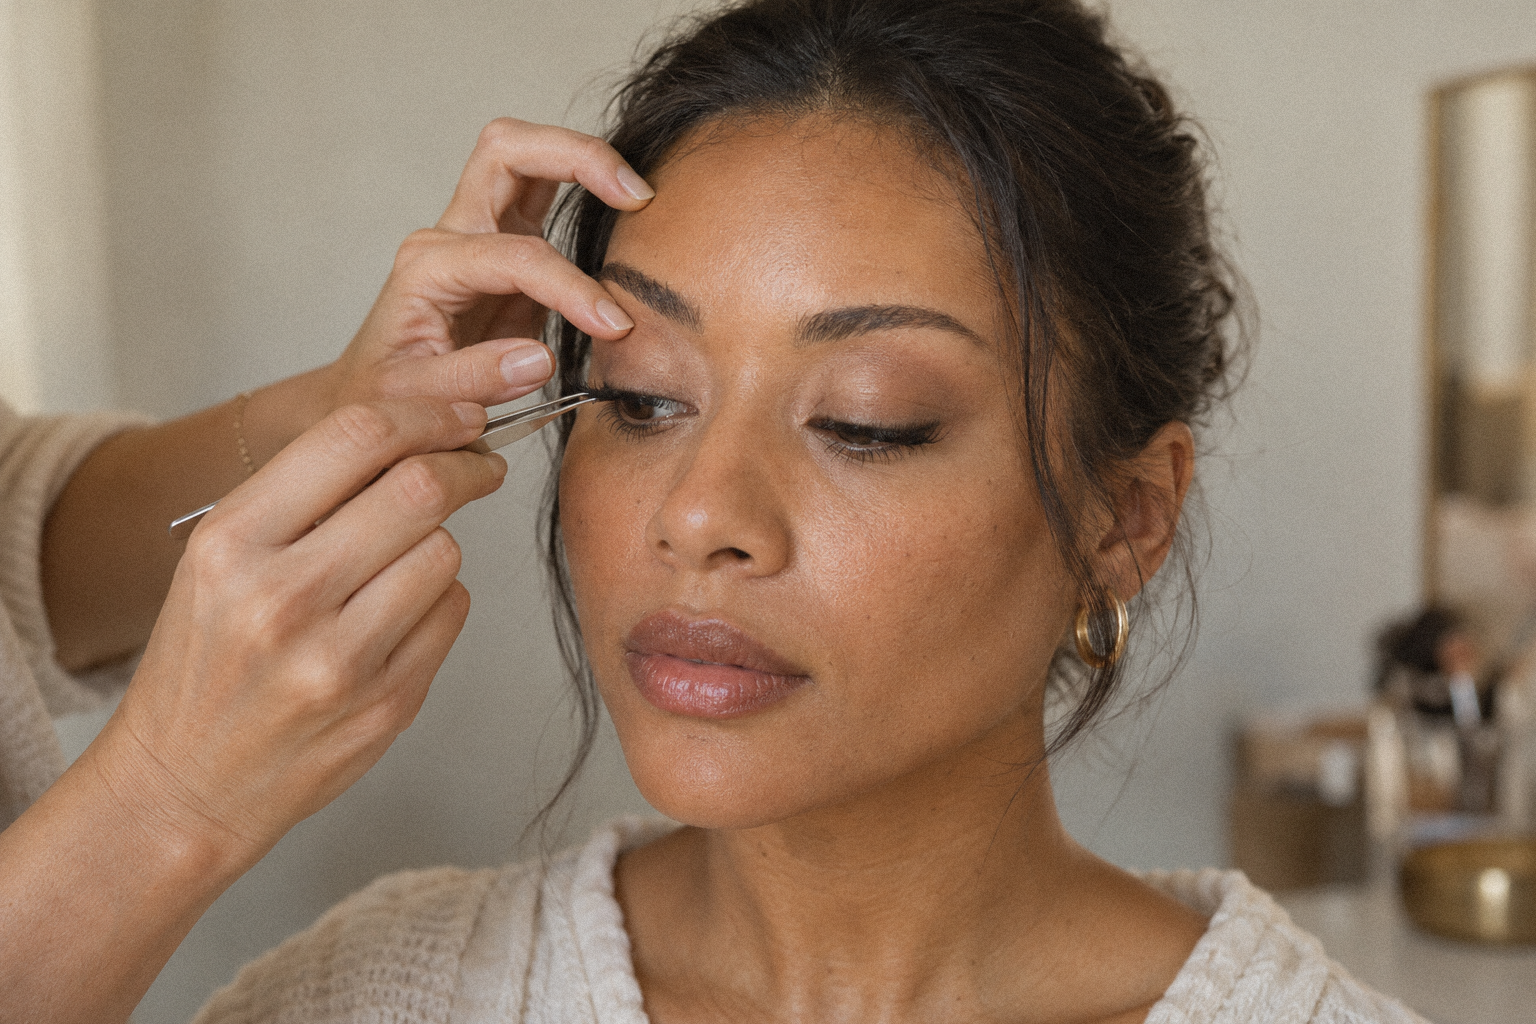
Choosing false lashes for your eye shape means considering both the effect you want and the eye you are working with. Openness, elongation, lift and fuller-looking lashes each call for a different strategy, but not every lash style works on every eye. Assess the eye shape, lid and makeup technique together, then judge the band, curl and length on the client with their eyes open—not just in the tray.
In short:
- Choose a lash strategy that suits the eye shape, lid, makeup technique and intended effect.
- Assess lid visibility, corner direction and eye spacing separately.
- Dry-fit each eye, trim the band off the face and reassess before gluing.
- Consider centre emphasis for hooded, downturned eyes, and temporary individuals when you need to customise shape and volume.
- Use photographs to compare symmetry and see how the finished makeup translates through the lens.
How Do You Choose False Lashes for Your Eye Shape?
Almond eyes suit many styles; round eyes often suit outer emphasis for elongation. Try lightweight definition for hooded eyes and curl and separation for monolids. For downturned eyes, particularly when the lid is also hooded, trial a rounded lash or greater projection through the centre rather than automatically adding length at the outside. These are starting points, not rules: adjust the band, length and density to the individual eye, makeup technique and desired effect.
Identify the features with the eyes relaxed
Ask your client to look straight ahead without raising their brows. Compare the eye opening, visible crease and corner direction; a hooded lid and a downturned outer corner can occur together. The basic distinctions below are useful visual descriptions, not categories every eye must fit perfectly.
| Eye feature | What to look for | Suggested lash starting point |
|---|---|---|
| Almond eyes | An elongated opening with tapered corners | Balanced wispy lashes; shift emphasis to suit the desired effect |
| Round eyes | A rounded opening, often with white visible below the iris | A soft cat-eye with modest centre length |
| Hooded eyes | A fold covering some or most of the mobile lid | A slim band, separated fibres and visible curl; trial centre projection if the outer corner also turns down |
| Monolids | No clearly visible crease | Curled, tapered fibres; test their visibility with eyes open |
| Downturned eyes | Outer corners sitting below inner corners | A rounded or centre-emphasised lash, especially with hooding; keep outer volume controlled |
| Upturned eyes | Outer corners sitting above inner corners | Balanced lashes for softness or a flare to emphasise the angle |
| Deep-set eyes | Eyes sitting farther beneath a prominent brow bone | Separated definition; check that tips clear the brow area |
What about close-set, wide-set and small eyes?
For a practical spacing check, compare the gap between the eyes with one eye’s width. If you want to visually balance closer spacing, try light inner corners and outer-third emphasis; for wider spacing, try balanced or centre emphasis rather than an extended outer wing. Check that this choice also works with the lid and corner direction.
For small eyes, start with a shorter band and sparse fibres. For deep-set eyes, test curl from the side before adding length: your fitting goal is visible definition without tips touching skin.
Which Lash Style Creates the Effect You Want?
As a design starting point, use centre emphasis for openness, outer emphasis for elongation and a balanced distribution for understated definition. Centre projection can also help create a lifted impression on some hooded, downturned eyes. Natural, wispy and dramatic describe the finish; rounded and cat-eye describe where the length sits. Always assess that distribution alongside the makeup technique: the lash should support the finished eye design.
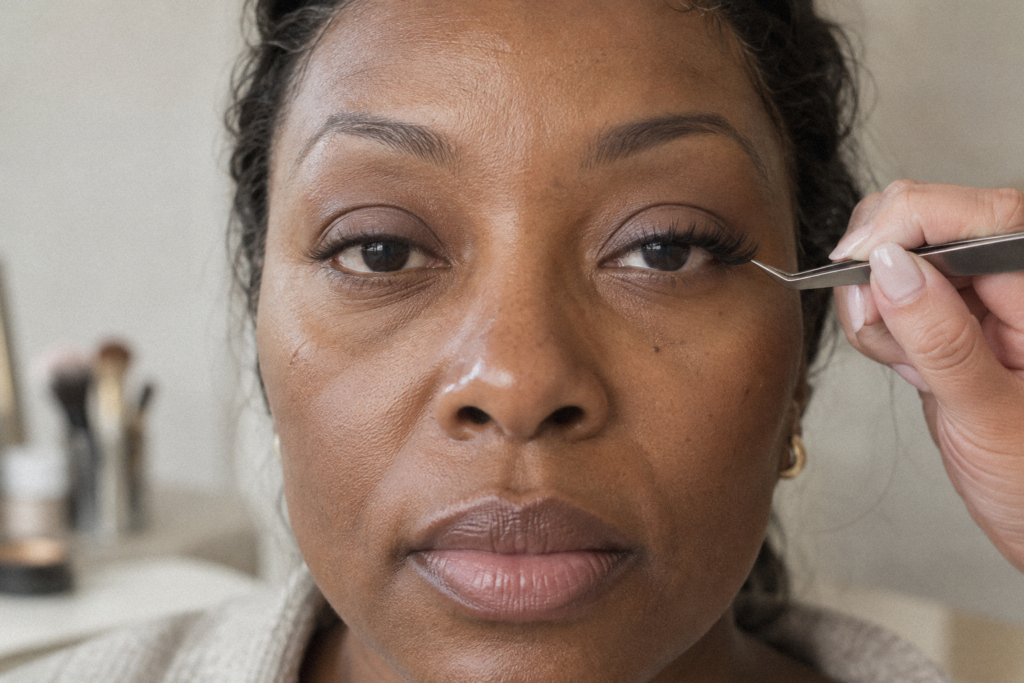
Compare shape, density and construction
| Feature | What to inspect | How to use it |
|---|---|---|
| Natural | Modest length and low density | Start here for subtle enhancement or fine natural lashes |
| Wispy and tapered | Varied lengths, fine tips and spaces between groups | Choose when you want texture without a solid curtain |
| Rounded | Longest fibres around the centre | Trial for openness or a lifted impression on hooded, downturned eyes |
| Cat-eye | Length increasing towards the outside | Trial for elongation; inspect the final corner carefully |
| Dramatic | Greater density, layering or length | Build impact selectively instead of increasing everything |
| Lash band | Thickness, flexibility and ability to hold its curve | Choose a band that conforms without collapsing or springing away |
Flexible does not have to mean flimsy. When natural lashes are very sparse or absent, a slightly firmer band may provide better support; it still needs enough flexibility to follow the lid comfortably.
What false lashes are best for hooded eyes?
Start with lightweight, separated lashes and a narrow band. Dry-fit a curled style, then ask the client to open their eyes: keep it only if the fibres remain visible without concealing the eye makeup you want to show. If the outer corners also turn down, compare a rounded style or one with more projection through the centre. Temporary individuals are another option when a full strip makes the expression look heavy.
Which false lashes make round eyes look more elongated?
Try a soft cat-eye rather than a pronounced central peak. Build length gradually through the outer half, keeping density controlled so the result reads as an elongated outline rather than added bulk. Reassess the outer corner with the eyes open, particularly if hooding or a downward angle is also present.
What lash style lifts downturned eyes?
In my experience, rounded lashes or lashes with greater projection through the centre tend to give a more lifted impression on some hooded, downturned eyes. I would not automatically choose an outer flare: the distribution needs to work with the individual lid and the makeup.
If you trial outer-third emphasis, compare it with a centre-emphasised option and keep the final section controlled. Keep the band beside the natural lash line: do not manufacture lift by gluing its end high onto the lid and leaving a visible gap beneath it.
Can you wear strip lashes with monolids?
Yes—try curled, separated fibres rather than assuming you need the thickest style. Compare two bands with the eyes open and choose the one that sits securely while giving the definition your client wants.
How Do You Choose Lashes When Eye Features Overlap?
Prioritise fit and comfort, then find a way to achieve the client’s preferred effect that works with their features. Treat lid visibility, eye outline, corner direction and spacing as separate decisions rather than competing labels. Consider how the lash will interact with the eye makeup, too.
Use a three-part consultation
- Ask about the result: subtle fullness, roundness, elongation or lift? Request a reference image, but discuss what the client likes about it and how it could translate to their eyes.
- Check the starting point: eye shape, lid visibility, corner direction, natural-lash length, density, direction, gaps, glasses and previous adhesive reactions. Consider the planned makeup technique alongside these features.
- Test one variable: change density, curl or length distribution—not all three at once.
For hooded, downturned eyes, trial a rounded lash with visible centre projection and controlled outer volume. For round, close-set eyes, trial a light inner corner and gradual outer emphasis, provided the lid and corner direction support it. Fit each eye independently rather than forcing identical trimming.
When the eyes are both hooded and downturned, rounded lashes or more projection through the centre can help lift the look. For some clients, temporary individuals are a better choice: they let me customise the volume and shape without making the expression look heavy.
Are Individual Lashes or Strip Lashes Better?
Choose a strip when its existing shape already suits the eye and the brief; choose partial lashes or temporary individuals when you need more local control. Individuals allow you to adjust both volume and shape rather than accepting the distribution of a full strip.
In my experience, temporary individuals can also feel lighter and less uncomfortable for mature clients. They are worth considering when you want definition without weighing down the expression. Assess the client’s comfort as well as the visual result.
Separate temporary lashes from extension mapping
This guide concerns removable makeup lashes, not professional semi-permanent extensions. Extensions use a different attachment process and adhesive system; do not substitute extension glue into a strip-lash application.
For targeted work, trial a partial strip where its shape suits the eye or temporary clusters where fullness is missing. Check the instructions: products called “individuals” or “clusters” can require different attachment points and adhesives. Do not assume every product belongs underneath the natural lashes.
How Do You Trim and Apply False Lashes to Fit?
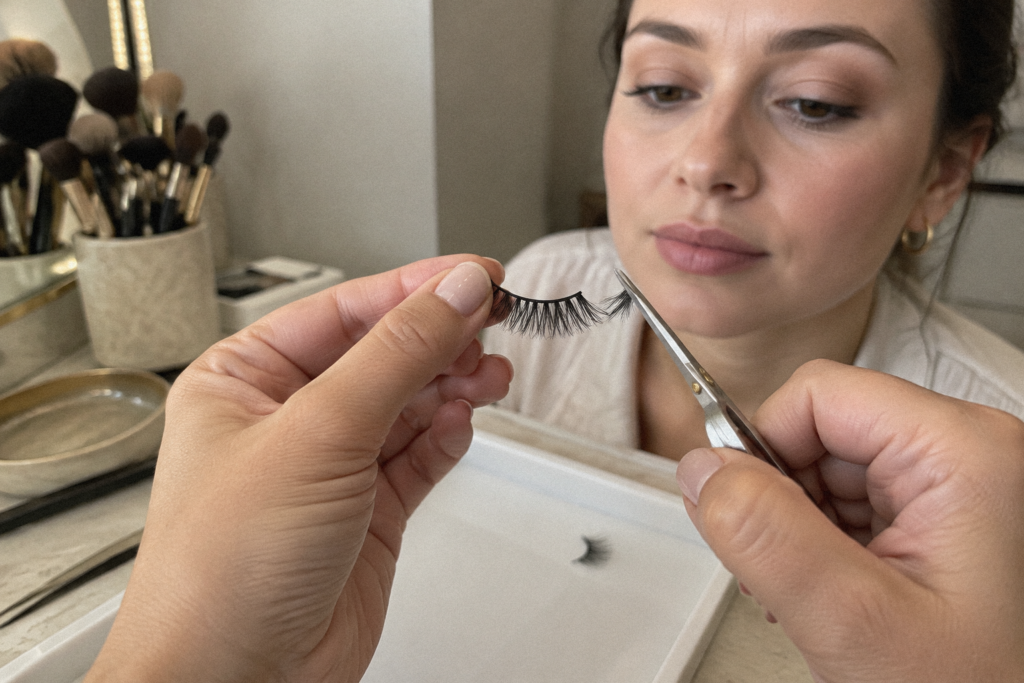
Dry-fit the strip before adding adhesive, then remove small sections from the outer edge. This preserves the shorter inner-corner fibres and helps prevent excess band from overhanging the eye. Reassess the length distribution after trimming: the shortened strip still needs to give the intended shape.
A repeatable fitting workflow
- Prepare hygienically. Wash your hands and use clean tools and a fresh client pair. Do not share eye cosmetics.
- Finish the surrounding makeup. Keep the attachment area free of oily residue. On dry lids, keep rich skincare away from that narrow line; on oily lids, blot excess before fitting.
- Dry-fit both eyes. With the client looking down, position the unglued band beside the upper lash roots. Leave the tear-duct area clear, then reassess with eyes open.
- Trim off the face. Use small scissors to remove one outer section at a time. Refit after each cut; never cut while holding the lash against the eye.
- Apply the specified adhesive. Follow its quantity and waiting-time instructions rather than using a universal countdown. Check the ingredients against known allergies.
- Secure and inspect. For a conventional strip, position the band on the skin immediately above the upper lash roots—not on the waterline. Check both ends, then ask the client to blink, smile and look down.
Correct the fit instead of adding more glue
If an inner corner pokes, remove and refit it. If the band overhangs, shorten it; if the outer fibres look heavy, choose a shorter final section or customise the shape with temporary individuals. Keep scissors away from attached lashes.
Stop using a product immediately if irritation occurs, and seek medical advice if it persists. Avoid eye cosmetics when the eye is infected or surrounding skin is inflamed, as the FDA’s eye-cosmetic safety guidance advises.
Which False Lashes Work Best for Bridal Makeup and Photos?
Choose the lash at the trial, then assess it in daylight and photographs before committing. Start with a shape that suits the bride’s eyes and makeup rather than automatically adding length or density. Use photographs alongside the in-person fitting to judge symmetry, lash projection and the overall effect.
Check expression, contrast and wear
Photograph the client straight on, smiling, looking down and at three-quarter view, with permission. Compare the apparent shape and projection on both eyes. Check whether you can still see the iris, whether the corners remain attached and whether the adhesive or band catches the light.
In my experience, makeup that looks exaggerated when viewed very close up can look completely natural in photographs. A photograph helps me compare symmetry and see how the makeup translates through the lens; it is a different assessment from looking at the client in person.
Across fair, medium and dark skin, choose lash colour in relation to the natural lashes and intended contrast, not skin tone alone. Trial brown for softer definition or black for stronger contrast; inspect clear-drying adhesive for visible residue on every complexion.
Keep a labelled spare pair and integrate the lash check into your all-day wedding makeup plan.
Photographs help not only the makeup artist but also the client. Seeing yourself in the mirror is different from seeing a photograph someone else has taken of you. Reviewing those images together gives the client another way to see the finished makeup.
FAQ
Should you apply mascara before or after false lashes?
For this workflow, apply a light coat to natural lashes first and let it dry. Keep reusable false lashes free of mascara unless their care instructions permit it.
Can clients wear false lashes with glasses?
Include their actual glasses in the fitting. Ask them to blink normally; if the tips touch the lenses, trial a shorter style rather than assuming more curl will solve it.
How should temporary lashes be removed?
Follow the adhesive’s removal instructions and use a compatible remover where specified. Never force a resistant band or pull at natural lashes; seek professional advice if removal is painful.
Does latex-free adhesive rule out a reaction?
No: latex-free does not mean every ingredient will suit every client. Review known allergies and the ingredient list, and stop immediately if irritation develops.
The best choice works with the client’s eye shape, lid and makeup technique while giving the intended effect and fitting comfortably through normal expressions. Record the style, trimming and placement that worked, then build on that fitting process with more practical makeup techniques from Raphael Oliver’s Journal.